
As I mentioned in my last posting, I visited the Woodturners of Northwestern Michigan last weekend. Lyle and Dori Jamieson (shown here) were kind enough to host me for a long weekend visit. This photo was taken in Dori's bead studio. She does some wonderful artwork in glass beads, and it was great to see her work displayed along with Lyle's throughout their lovely home.

Also in the Jamieson household is Alee - a lab mix, and a very sweet dog. She was very well-behaved if you don't count the turkey she retrieved off the dining room table when everyone was sitting out on the porch for dinner.

The Jamieson home is on a five acre lot that hosts a pond and wetland area. The house is nestled in amongst the trees, and there are dozens of bird species at their feeders. I counted five species of woodpeckers in about 15 minutes time, including this splendid male pileated woodpecker. I also spotted a red-bellied woodpecker, Hairy and Downy woodpeckers and a Northern Flicker. Their feeders also supported the following species: tufted titmouse, blue jay, red winged blackbird, sparrows I didn't recognize, black-capped chickadees, white-breasted nuthatch and a bunch I didn't recognize.
After the three days of teaching, I had a morning to fill before I could fly back home. Lyle offered to refresh my memory on making hollowforms using his boring bar system. I did a few hollow forms in 2002, but haven't really done them since that time. I'm ready to work in that format now, so it was great to have a few hours with Lyle in his shop. Thanks, Lyle!

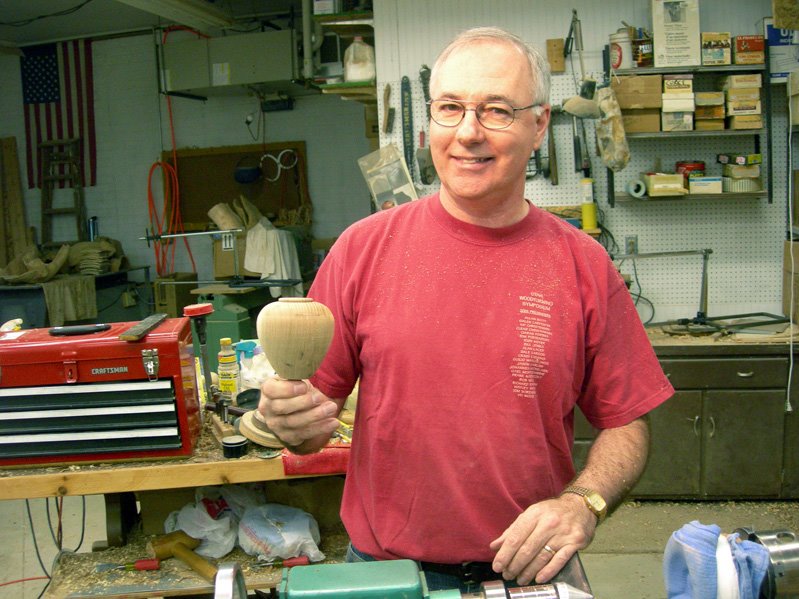
Lyle Jamieson is well-known for his figurative pieces that are turned on multiple axes and then sculpted. Lately he's been doing a lot of carved pieces that are not worked on the lathe at all. This is a work in progress inspired from a drawing hanging in the guest bedroom at John Hill's home. I think the drawing was done by John's mother. I saw it there when I visited the Carolina Mountain Woodturners in 2004.
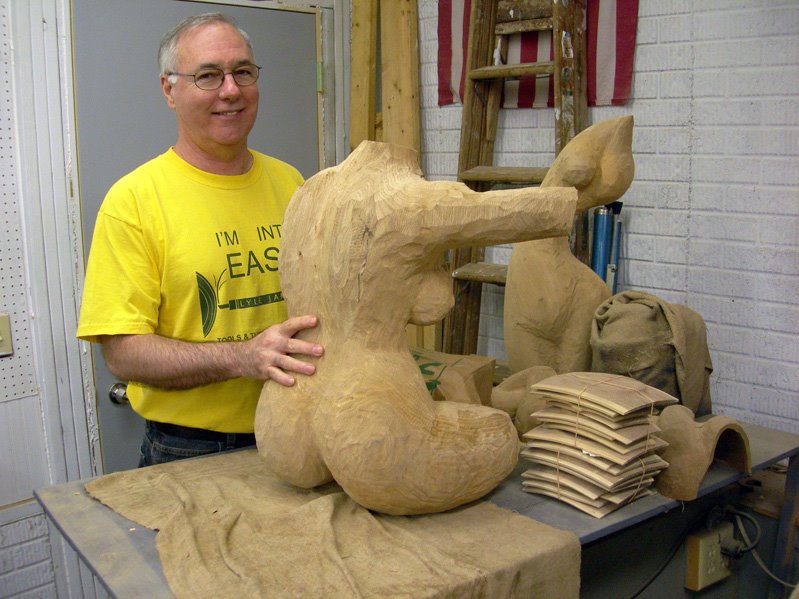
Lyle's holding it for scale here. It's going to be absolutely stunning when it's finished.
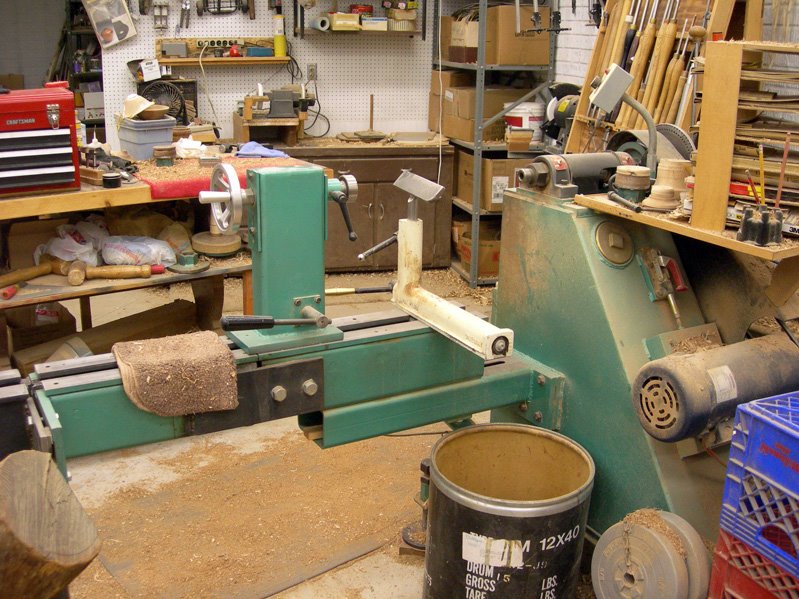
This is one of the Nichols lathes in Lyle's shop. This is definitely a working shop, not a showroom trophy. It's nicely organized into work areas appropriate for turning, teaching, carving and sculpting. I wish I had this kind of room, but, alas, I'm stuck with the narrow room in our basement for now. I posted a picture of my shop on a previous post about my oak leaf carving project in progress.
Here is a sequence of pictures showing the making of a hollow form from start to finish.
Lyle selected a log section and trimmed the ends. Then he found the balance point that maximizes the blanks to be cut from the log.
Placing the pith on center, you look for the distance that is equal on either side of the pith and mark a line. You have to do this on both ends of the log section. This is one side.
And here's the other end.
A benchmate is a useful thing to have in the shop for sawing logs into sections. An electric chainsaw is also useful for indoors. The first cut is to rip the length of the log into two halves along the lines that are marked. A quick tap on either end where the line is marked gives a good guideline to follow with the blade.
Small saws don't usually have sufficient clearance to let the shavings of a rip cut clear the chain. Lyle removed some area over the cover to help clear shavings - not recommended by OSHA, but it sure does the trick.
For a hollow form, the blank needs to be cut into a rectangular shape. These two lines are marked equidistant from the pith to balance the grain of the blank.
A ripping cut along the first line.
The blank is wedged into the slot of the benchmate for the second ripping cut.
The blank was a bit long for the small hollow form I wanted to work on, so Lyle trimmed one end.
This is an air driven chisel for removing the bark.
Wow, does it work well! I usually take a chisel and hammer to remove the bark. This tool does the job in seconds. Lyle has a slogan he repeats often: "I'm into easy."
Lyle drew a goblet outline on the blank to show me how he would orient a goblet to take advantage of the grain orientation.
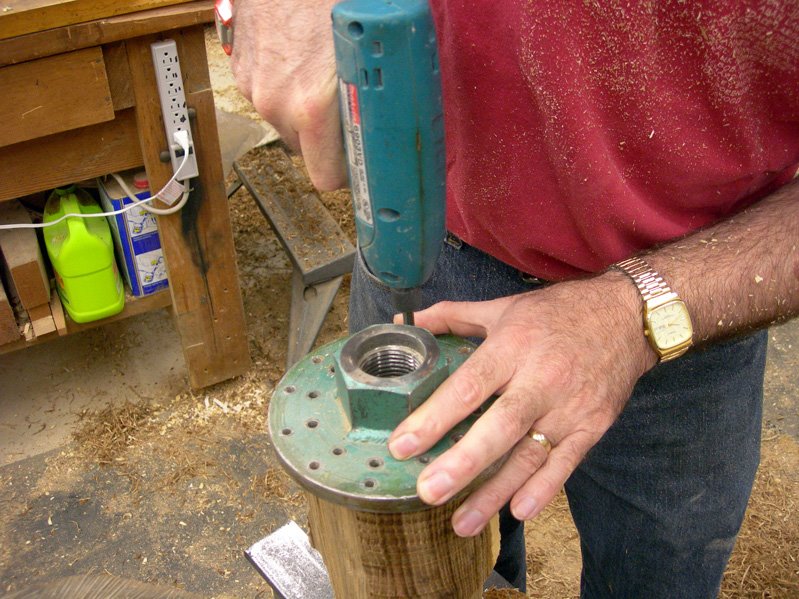
This is an adjustable point spur drive. The point needs to stick out far enough from the spurs so that the blank can be held on the point for the first step on the lathe, which is to balance the blank between centers. I didn't snap a picture of that, but the process is to mount the blank without tightening down the tailstock. The blank will balance to the heavy side. You then ease the blank up to a position where the weight is balanced all around.

For a small blank, a standard live center is sufficient. For some of Lyle's sculptural pieces, he has to pull out the big gun - now, that's a live center!

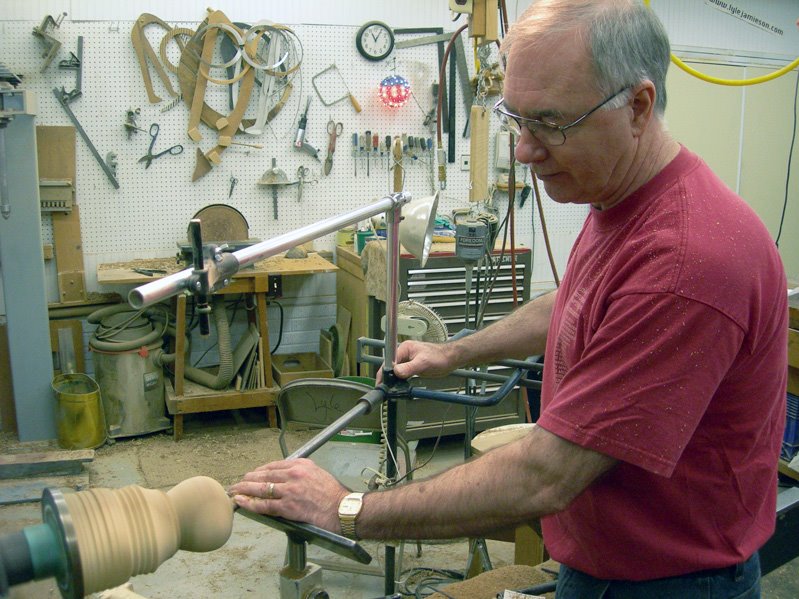
After the blank is balanced between centers, it can be rounded by taking a series of cuts along the length. Lyle used a bowl gouge to make these small cuts from outside toward the center, rather than sweeping cuts along the length of the blank. This is the same method I use and it sure is a lot easier than hitting the corners of the blank all down the length.

The end toward the live center is cut with a slight concave surface to accept the faceplate. Lyle prefers a faceplate with a lot of screws to eliminate vibration.

You don't need too much of a concave surface here, just enough to make sure the faceplate doesn't end up with a high spot.

To help center the faceplate, a series of concentric circles is drawn with a pencil (while the lathe is spinning). The nub is chiseled off.
Lots and lots of screw holes! The more the better.
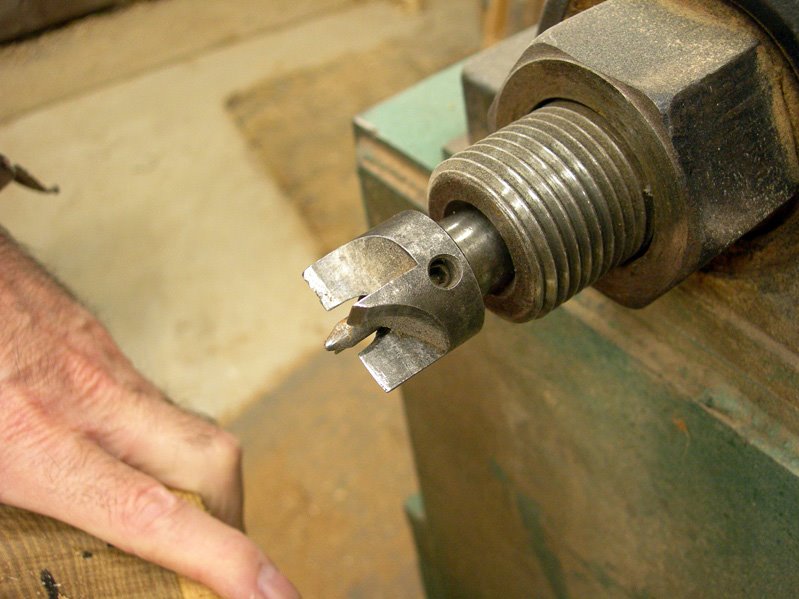
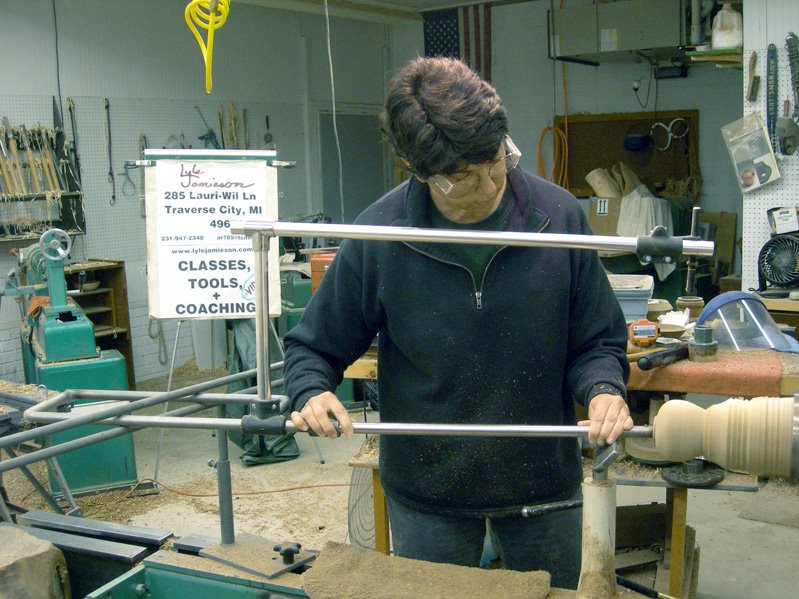
We used Lyle's boring bar system. You can check his website for more information on his tools.

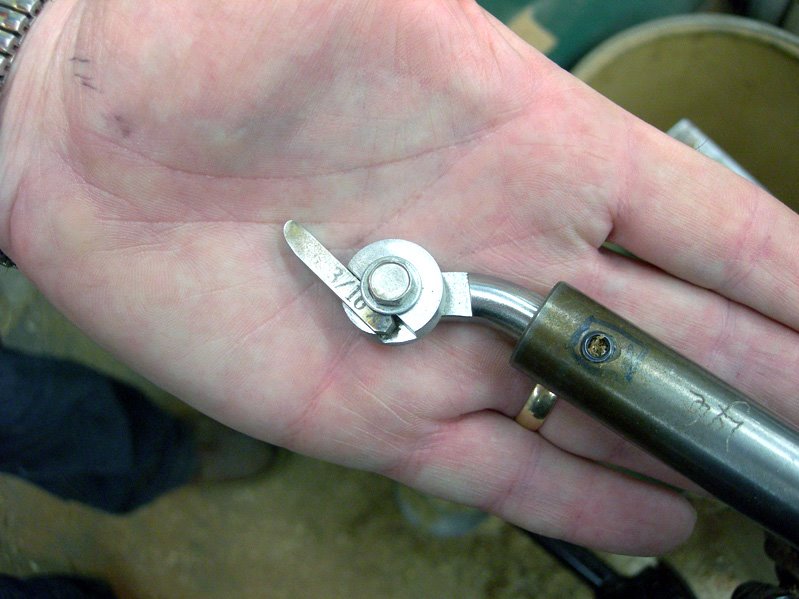
This is a wooden model of the shape of the bevel. Lyle sharpened it by holding the scraper in his fingers, bracing his hand against the safety guard of the grinding wheel, and pulling the scraper across the wheel from the side to the front. The corners of the grinding wheel are rounded.

The cutting surface needs to be at center, or just above center. The position of the holder relative to the shaft makes this a negative rake scraper, which is great for reducing the potential for catches. I made the opening a bit on the small side, which made it a bit challenging to get the cutter inside the vessel.
Waxing the metal surfaces with a candle makes the boring bar glide with little effort. When everything is set up correctly, the hollowing can be done with fingertip control. As Lyle puts it, "I'm into easy."
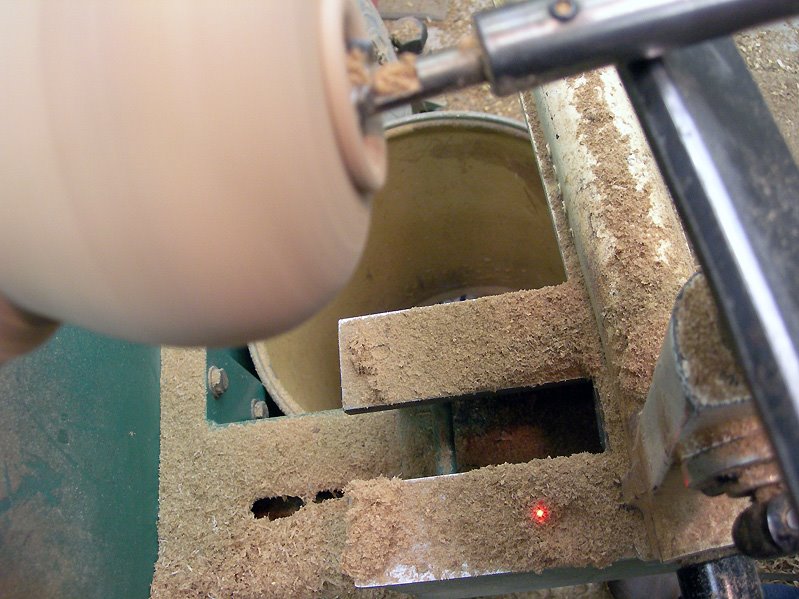
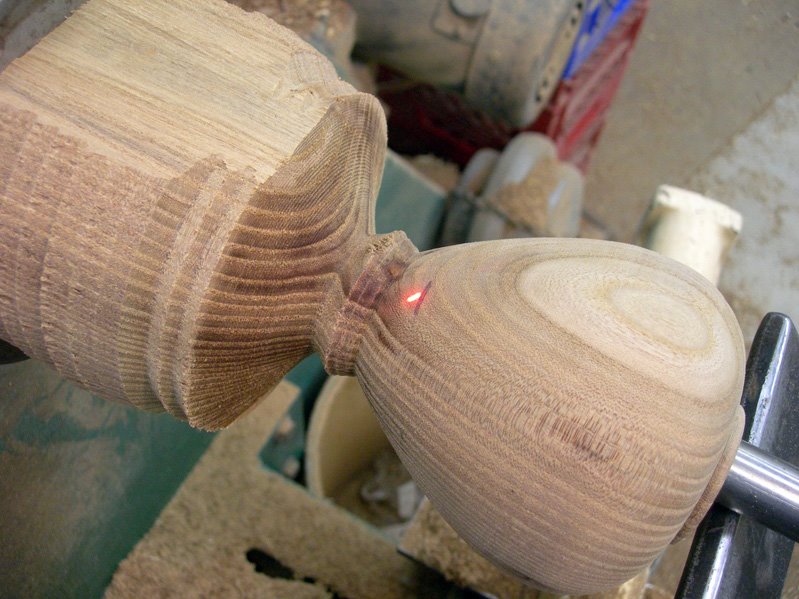
The first stages of hollowing are done without the laser guide. A drill hole was made to give the tool easy access. This is an endgrain piece, so the cuts are made from center toward the left. It really is easy!

After a space is cleared for shavings, the laser guide is used to establish the final wall thickness. This is a diagram on Lyle's teaching flip chart showing the correct position of the laser relative to the cutter for different sections of the curve.
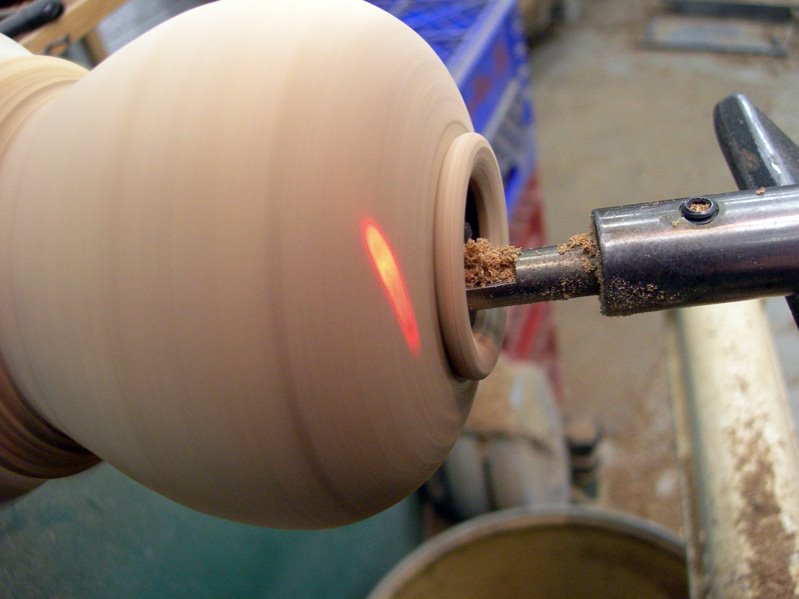
Once the laser is set, you work a section of the curve that applies to that setting. Here the laser shows the cut as it begins.

Here the cut is nearing the final wall thickness.
And here it is finished - the laser dot just fell off the outside of the hollowform. To clean up the tool marks, you lightly pass the scraper over the high spots - this is done by listening rather than by watching the laser point.
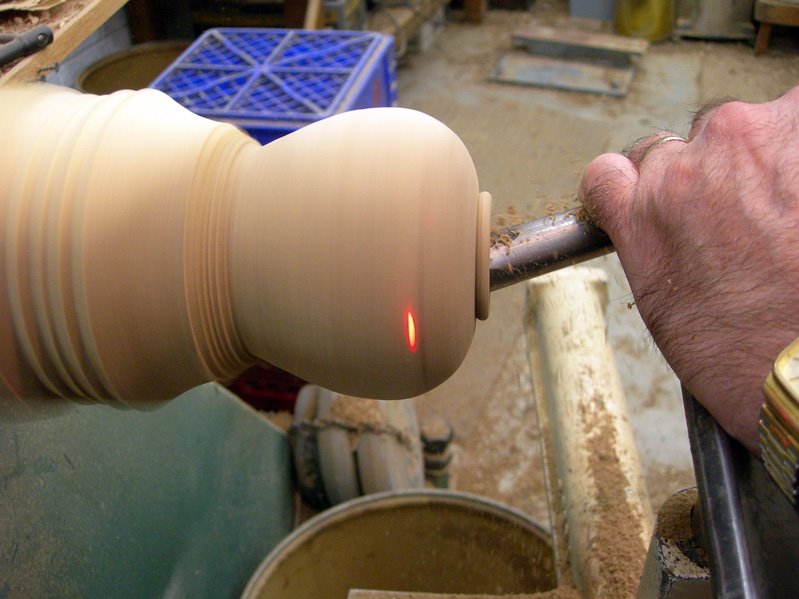
The procedure is repeated down the length of the hollow form, adjusting the laser position as needed to accommodate the geometry of the curve.
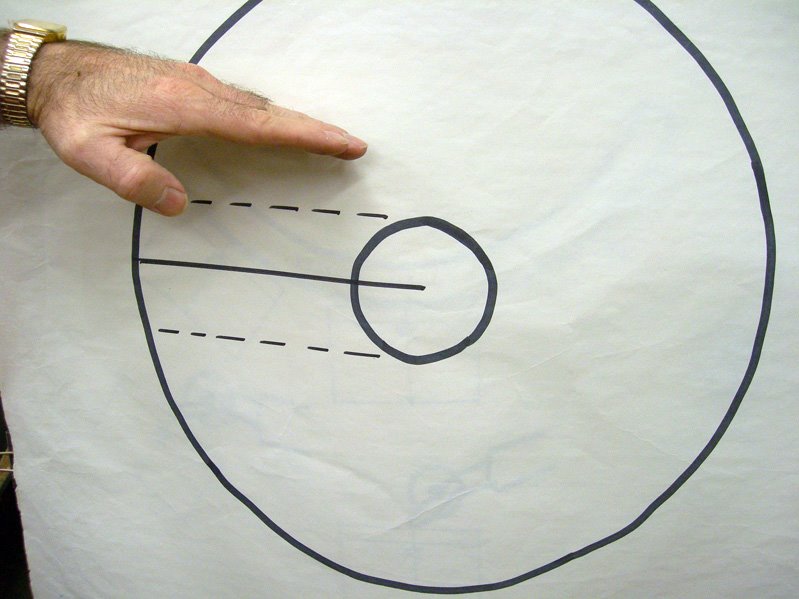
Setting the laser position is different for the bottom curve. The hollow form has been turned to just about its final shape and the position of the foot is marked.

The laser position is adjusted to the end of the scraper blade so you can "see" the curve on the inside of the form.

Here's the initial set-up for this step.

And a final check after the laser has been secured into position.
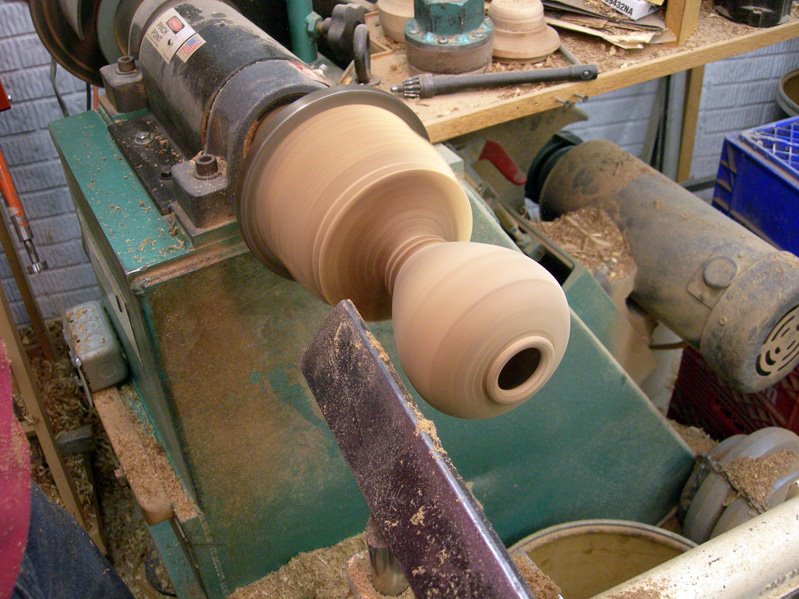
For this part of the hollowing, it's important to have the cutting edge right on center. Lyle scored some lines across the bottom to check the position and adjusted the height of the cutter until it was on center.
The laser dot now shows the position of the cut as it's happening.
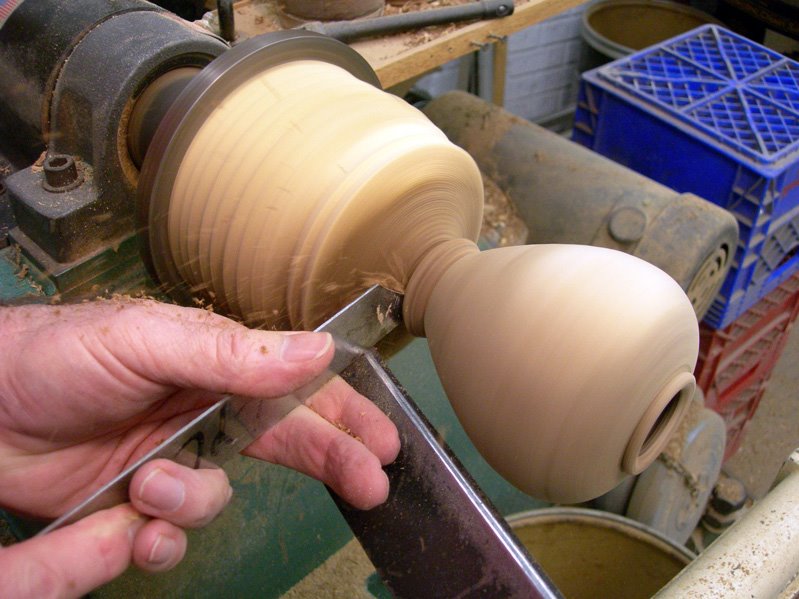
After the hollowing is finished, the vessel is parted from the blank.
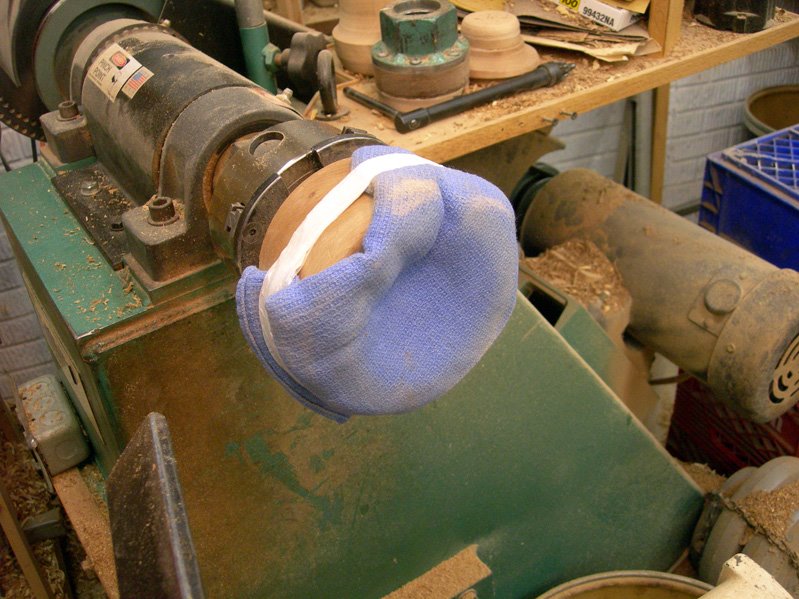
This is a jam chuck - basically a bowl that is covered in a padded surface.

The nub is sanded off on a sanding wheel (or belt) and then the top part is adjusted for centering. Lyle's thumb is marking the high spot. The form is moved halfway toward the difference between the high spot and low spot.

Ditto for the bottom half.
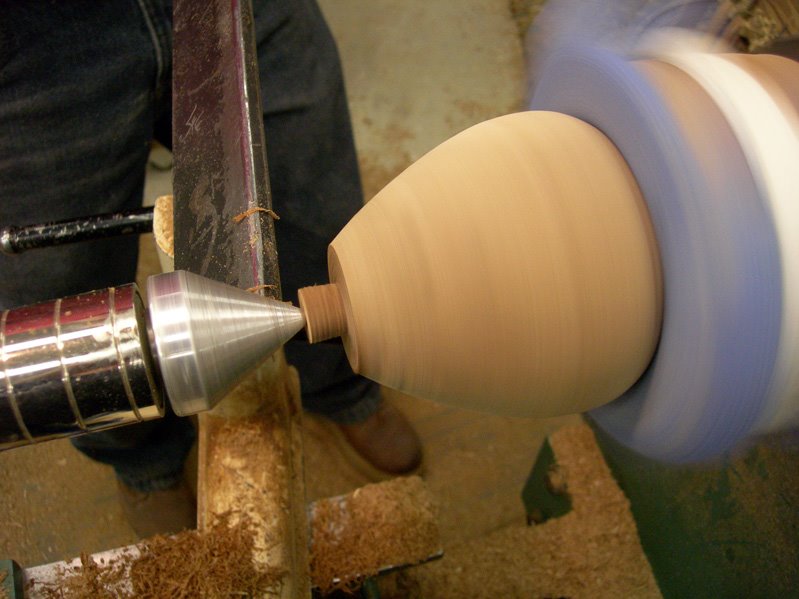
The foot is shaped and any detail lines are added here. The nub is carved off rather than parted off. With endgrain pieces you could pull some of the fibers with that last cut, so it's safer to carve off the nub rather than chance a hole in the foot.
Thanks, Lyle - that was a great way to spend a morning while waiting for a flight home!


2 comments:
thanks for the interesting tour of Lyle's world ...
however ....
the second picture was of a dog other than emma! ... now i'm not certain but i suspect emma's going to be upset and demand equal booking -- better get her blog updated!
e
Shhhhh! Don't let Emma know. . . She'll be jealous.
I'm glad you enjoyed the virtual tour of Lyle's shop. It was a fun visit.
Post a Comment