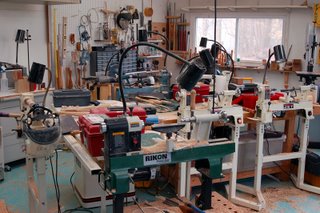
On Sunday, December 3, 2006, I took a hands-on class with Mark Sfirri. We used Barbara Crockett's shop and our club Jet minilathes. Mark adapted his class for the smaller size scale we'd need for the minilathes. We did several of the projects he had demonstrated the day before at Wood Werks.

The first project was with the glued up blanks of wood to give us some experience on seeing and cutting the shadow lines.
L to R: Mark Sfirri, Jim Burrowes (assisting), Booker Brooks, and Devon Palmer.

After turning two half beads and a cove on the glued up blank, we split the blank down the glue line and turned the individual halves. First on a balanced axis and then on a diagonal axis.
 Here are my morning projects. The two on the left are from the split piece of wood. On the middle piece I put the split blank on a diagonal axis and turned just the top bead to see the effect. It essentially twists the facet of the surface. The lower half of that piece still has the original profile turned on the blank while the two halves were glued together.
The form on the right is a wave form turned on two axes. You can see details in yesterday's post.
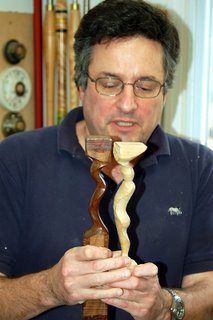
Mark showed us some figures he had made and how the wave form and glued up blanks play into their construction. The one on the left is a wave form. The one on the right started out as a glued up block.

Barbara made a very tasty beef stew for us to have at lunchtime. We also enjoyed hearing Devon Palmer play tunes on the baby grand piano. Devon is full of surprises - he used to play as a studio musician and did the piano lounge circuit. What a treat to hear him play!

Jim Burrowes enjoyed listening to the music.

It was a nice lunch!

The first project after lunch was the off center table leg. Since we were using a mini lathe, we had to scale this down quite a bit.
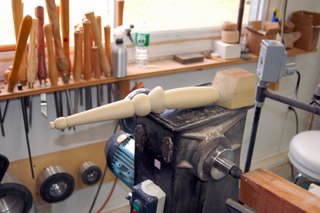
That's the basic shape we're after.

The first part of the project is doing the layout on the rectangular blank. This involves a bit of measuring and thinking about the axes that will be used in the turning as well as what the final product will be.
L to R: Monica Bluestein, yours truly (can't miss me in my Proserpine Turnout 2005 smock), Mark Sfirri, and Booker Brooks.
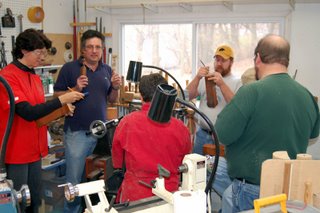
You wouldn't think something so simple as a layout would be so confusing.
Scott Hogsten is in this pic (green shirt).

How's that again????

A study in concentration. . .
 This is the layout for the top of the blank. You find the diagonal center and mark that. Then you measure about 0.5 inch in from the inside corner of the table leg and mark that as the first turning axis. Draw a 0.5 inch square with the first axis as one corner, extending the lines to the inside corner of the table leg. The square marked out in the middle is the size of the table leg where it meets the apron, 1.5 inches square. The second turning axis is marked near the opposite corner - 0.5 - 0.75 inches from the corner. The distance depends on how much wood is left after doing the pommel cut.
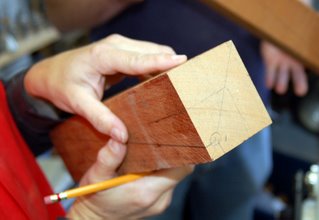
You measure about 2.25 inches down from the top of the blank and mark that line. The square on top is about 1.5 X 1.5 inches. Extend that line down the tangential surfaces of the inside corner. That makes a rectangle 2.25 X 1.5 inches. You then mark the center of the bottom line of that square for a guide point.

On the bottom of the blank, you find the diagonal center. On the outside corner of the blank you measure in 0.5 inch from each side and mark that as the center for the first axis. Mark a square with the first axis center point as the inside corner.

A line is drawn on two sides that goes from the inside corner to the outside corner, through the midpoint drawn on the rectangle of the upper part of the table leg, with the endpoints being the corners of the square you previously laid out that incorporates the center points of the first axis. This shows your offcenter axis line.

It's helpful to label the "Top" of the blank.

Now, we're ready to begin. The blank is mounted on axis one.

Look who's crashing the party after lunchtime! Hello, Walt Betley! Walt is a charter member of Central Ohio Woodturners and he has more than 70 years turning experience. He's also my neighbor across the street and a very nice guy to know.
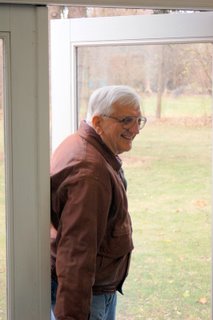
Yes, do come in, please.

Walt just dropped by to lend some support, give encouragement, and spread a bit of sunshine around.

Ok, back to work now. The first cut is for the pommel, where the top of the leg meets the apron.

You can see each of the students are recording this demo with our digital cameras. Talk about paparazzi.

The top of the leg is turned next.

Then the rest of the leg is rounded a bit before the first feature ring is turned.

After the first detail is done, the blank is moved to the second axis. The second detail is turned and then the bottom of the talbe leg.

A detail is put on the bottom of the leg.

After all the turning is done, Mark took the leg to the bandsaw and trimmed the top down to where the 1.5 X 1.5 inch square was drawn.
The last project of the day was a mock-up of the two-axis candlestick Mark had demonstrated on Saturday. We didn't have blanks that were pre-drilled, so we just pretended we were making candlesticks. We'd have to begin with drilling the hole on an angle to match the second axis of the turning.

This is the top layout showing where the hole would have been drilled. The center of the hole is axis two. The first axis is about 0.5 inches in from the opposite edge.

Axis 1 on the bottom is near the outside edge. The second axis is in the center.

The project begins by first rounding off the corners of the blank.

Then the blank is mounted on the first axis. The transition line is marked; this is the widest diameter of the turning.

You can see that transition point as the blank is spinning.

The top side of the base is defined and turned.

The shape of the base section leading to the transition point is turned.

Here's what it looks like at this stage.

A comparison of the final product.

Rouging down the cylinder some more before turning the first feature ring.
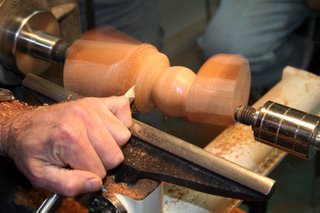
The first feature ring is turned on axis number one.

Top and bottom of the ring is on the first axis.

The blank is moved to axis number two.

The base is refined, the top section is turned.
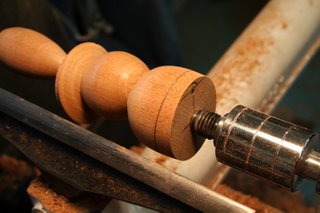
The base is reduced in height, and with a few clean-up steps to remove the nub, it's all done.

Here are all of my projects from the class. I don't do much in the way of spindle turning, but I've enjoyed learning about these off center techniques.
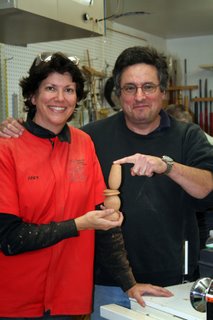
Mark and I posing with my turned candlestick. Thanks, Mark! It was a fun day in the shop.
(Also, thanks to Steve Wolfe for many of the pictures from today's post.)


No comments:
Post a Comment